The ultimate guide to lash mapping for beginners
Lash mapping is an essential skill for any budding lash artist, and this comprehensive guide is here to help beginners navigate the intricate world of eyelash extensions. In this ultimate guide, we’ll break down the fundamentals of lash mapping, providing you with the knowledge and techniques needed to create stunning, customized lash designs that will leave your clients feeling confident and beautiful. So, grab your tools, prepare to delve into the art of eyelash extension mapping, and unlock the secrets to mastering this essential technique.
What is lash mapping?
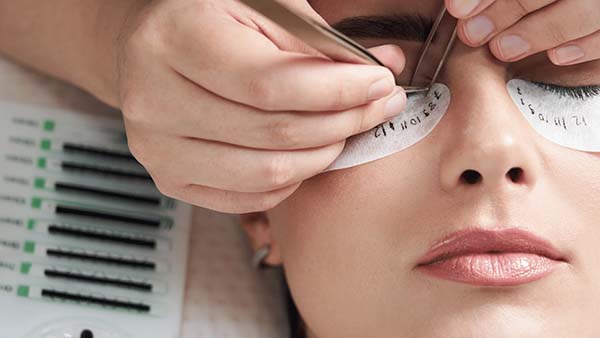
Lash mapping is a technique used in the field of eyelash extensions to design and create customized lash looks for clients. It involves carefully planning and mapping out the placement of individual lash extensions to achieve a specific desired outcome. Lash artists use this technique to enhance the natural beauty of their clients’ eyes, correct asymmetry, and achieve a balanced, flattering appearance.
Lash mapping is a skill that requires precision, creativity, and an understanding of both the client’s preferences and the principles of design. When done correctly, it can result in stunning and natural-looking lash extensions that enhance the client’s beauty while maintaining the health of their natural lashes.
How many types of eyelash mapping styles?
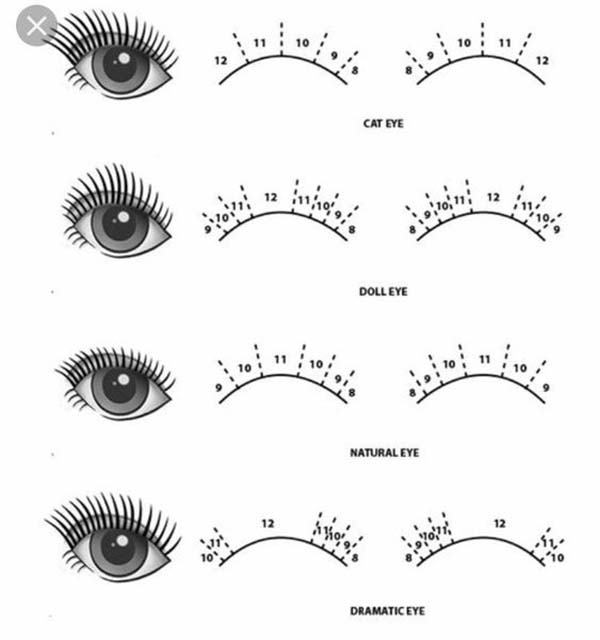
Eyelash mapping styles can vary based on the client’s preferences, eye shape, and desired look. Lash artists have the flexibility to create custom lash mapping designs tailored to individual clients. However, there are several classic eyelash mapping styles that are commonly used as a foundation and can be modified as needed. Here are a few popular lash mapping styles:
- Natural Lash Mapping: This style aims to enhance the client’s natural lashes while maintaining a subtle, everyday look. Longer extensions are typically applied to the central lashes, gradually tapering to shorter lengths toward the inner and outer corners of the eye.
- Cat-Eye Lash Mapping: Also known as a “cat-eye” or “winged” look, this style emphasizes longer lash extensions on the outer corners of the eyes, creating a lifted and elongated appearance. It’s great for clients looking for a glamorous, dramatic effect.
- Doll-Eye Lash Mapping: This mapping style focuses on creating a wide-eyed, doll-like appearance. Longer extensions are applied to the center of the lash line, with shorter extensions on the inner and outer corners. This style can make the eyes appear larger and more open.
- Kim K Lash Mapping: Inspired by celebrity Kim Kardashian, this style involves applying longer extensions throughout the entire lash line to achieve a full and voluminous look with a slight curl. It’s ideal for clients who want a bold, luxurious lash appearance.
- Hybrid Lash Mapping: Hybrid mapping combines both classic and volume lash extensions to create a textured, multidimensional look. Classic extensions are used on some natural lashes for length and volume, while volume lashes are applied in a fan-like pattern to create added fullness.
- Custom Lash Mapping: Lash artists often create customized lash mapping styles based on the client’s unique features and preferences. This may involve a combination of different mapping techniques and lengths to achieve a personalized result.
What you'll need for lash mapping?

Lash mapping is a precise and detail-oriented process, and to successfully carry it out, you’ll need several essential tools and supplies. Here’s a list of what you’ll typically need for lash mapping:
- Magnifying Glasses or Lash Loupes: These are essential for getting a close-up view of the client’s natural lashes, allowing you to assess their length, health, and any potential issues.
- Lash Mapping Tools: Lash mapping involves creating a plan or design for the lash extensions. You may use specialized mapping tools like lashes mapping stickers, lashes mapping tape, or a white eyeliner pencil to mark reference points and guide the extension placement.
- Client Consultation Form: Have a form for clients to fill out to gather information about allergies, sensitivities, and their desired lash look.
Remember that maintaining a clean and organized workspace is crucial for lash mapping. Additionally, continuous practice and training are essential to improve your mapping skills and deliver the best results to your clients.
What to check before you start lash mapping?

Before you begin the lash mapping process, it’s essential to perform a thorough assessment and preparation to ensure a successful and safe lash extension application. Here are the key lash tips and tricks to check before you start lash mapping:
- Client Consultation: Engage in a detailed consultation with the client. Discuss their preferences, any allergies or sensitivities, their desired lash look, and their overall expectations. Make sure the client is aware of the process and aftercare instructions.
- Natural Lash Assessment: Examine the client’s natural lashes. Check for their eyelash extension lengths, thickness, and condition. Ensure that the natural lashes are strong enough to support the chosen lash extension style. If there are any weak or damaged lashes, discuss this with the client and consider alternative options.
- Eye Shape Analysis: Analyze the client’s eye shape and symmetry. Different eye shapes may require different lash mapping techniques. Ensure that your mapping plan enhances the client’s natural features and addresses any asymmetry.
- Client Comfort: Explain the lash mapping process to the client, including how long it may take and what to expect. Ensure that they are comfortable and offer eye pads or tape to protect their lower lashes and under-eye area.
- Personal Protective Equipment (PPE): Wear appropriate PPE, such as disposable gloves and a mask, to maintain hygiene and safety throughout the procedure.
- Timing: Ensure you have allocated enough time for the lash mapping process. Rushing can lead to mistakes and a subpar result.
By carefully checking these aspects before you start lash mapping, you’ll create a positive and safe experience for your client while maximizing the chances of achieving the desired lash look.
Eyelash Extension Mapping Guide
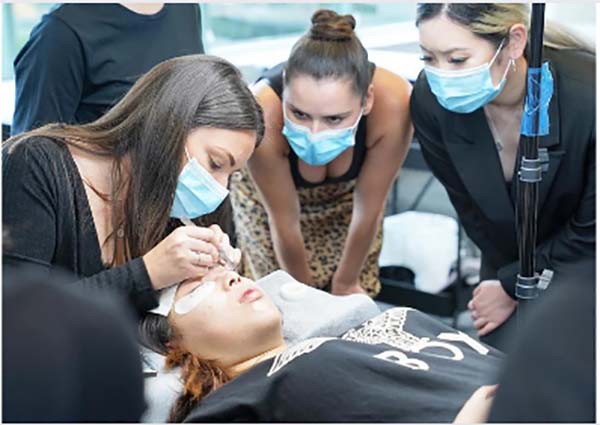
Applying lash extensions is a meticulous process that requires skill, precision, and attention to detail. Here is a step-by-step guide on how to apply lash extensions using lash map guide:
Step 1: Preparation
- Apply gel eye pads or tape to secure the lower lashes and protect the under-eye area.
- Cleanse the client’s natural lashes using a lash cleanser or primer to remove any oils or residue.
Step 2: Isolate Natural Lashes
- Use a fine-point tweezer to isolate a single natural lash, gently separating it from the others.
- Hold the isolated lash with the tweezer close to the base, leaving a small gap between the tweezer tip and the eyelid
Step 3: Apply Adhesive
- Dip the base of the lash extension in a small amount of lash adhesive. Ensure the extension is lightly coated but not dripping with adhesive.
- Carefully attach the extension to the natural lash, about 1-2 millimeters away from the eyelid. Do not touch the skin with the adhesive.
- Hold the extension in place for a few seconds to allow the adhesive to bond.
Step 4: Repeat the Process
- Continue isolating and applying extensions to individual natural lashes, working in a zigzag pattern across the lash line.
- Vary the lengths and lash extension curl types based on your lash mapping design, ensuring that you follow the lash map you’ve created.
Step 5: Check for Balance and Symmetry
- Regularly step back and assess the client’s lashes to ensure that the extensions are being applied evenly and symmetrically on both eyes.
- Make any necessary adjustments to maintain balance and uniformity.
Step 6: Drying Time
- Allow the lash adhesive to fully dry. This usually takes a few minutes, but the drying time may vary based on the adhesive used.
- Use a fan or an air blower to help speed up the drying process if necessary
Step 7: Aftercare and Final Touches
- Once the extensions are fully dried, gently brush through the lashes using a disposable mascara wand or microfiber brush to separate and shape them.
- Educate the client on proper aftercare, including avoiding water, steam, and oil-based products for the initial 24-48 hours.
- Provide aftercare instructions to the client, explaining how to maintain and care for their lash extensions to prolong their lifespan.
Step 8: Completion
- Ensure the client is comfortable and satisfied with the results.
- Schedule a follow-up appointment for a lash fill, typically needed every 2-4 weeks to maintain the fullness of the lash extensions.
Applying lash extensions is a delicate process, and it’s essential to maintain a calm and steady hand throughout. Continuous practice and experience will help you become more proficient in this art, allowing you to create beautiful, customized lash looks for your clients.
In conclusion, this comprehensive eyelash mapping guide has provided beginners in the world of eyelash extensions with the essential knowledge and skills needed to embark on their journey into lash mapping. We’ve explored the fundamentals of lash mapping, from understanding its significance to the step-by-step process of creating a customized lash design.
